Luminar Neo: Creative color isolation using AI masking
 Luminar Neo
Demo summary
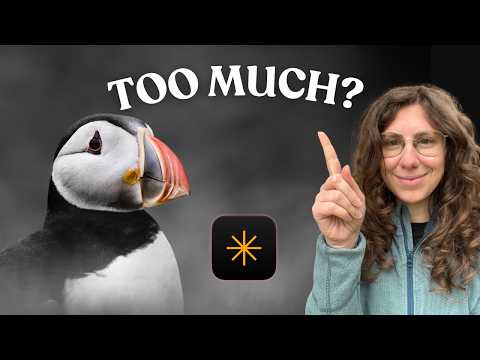
The creator demonstrates a creative 'fine art' look by using Object Select AI to mask a bird, inverting the mask, and desaturating the entire background while keeping the subject in color.
Step-by-step
- Open the HSL tool
- Go to Masking and select Object Select
- Select the specific parts of the subject you want to keep in color
- Go to Mask Action and click Invert
- Go to Adjustments and lower the Saturation to zero
- Apply a Vignette and choose the subject as the center point
Options
- Increase the strength of the vignette to match the creative atmosphere
Tips
- Use this technique to create a 'fine art' look by desaturating everything except the subject's characteristic colors
- Go stronger with the vignetting when creating a moody or creative atmosphere
Highlights
“I'm seeing this as something more fine art... obviously this is really creative”
All demos from “How Far Should You Edit Wildlife Photos? (Luminar Neo Tutorial)”
- 1:352:01Natural wildlife photo editing in Luminar NeoThe creator demonstrates basic adjustments in Luminar Neo including cropping, using the AI Noiseless tool for denoising, and adjusting tone and white balance via the Develop module.Luminar Neo· AI Image/Photo Enhancer
- 4:061:34Enhancing image pop and structure with AIThe demo shows how to use Enhance AI's accent slider for exposure and color pop, followed by Structure AI with manual brush masking to sharpen specific details on a bird.Luminar Neo· AI Image/Photo Enhancer
- 5:470:39Adjusting HSL and subject-aware vignettingThe creator uses the Color tool to target specific HSL values for a bird's bill and applies a vignette using a subject-placement indicator.Luminar Neo· AI Photo Editor
- 7:252:05Reshaping light with Relight AIThe video demonstrates the Relight AI (referred to as light depth) tool to adjust brightness and temperature based on 3D depth, effectively changing the lighting direction on the subject.Luminar Neo· AI Relighting
- 10:270:52Creative color isolation using AI maskingCurrentThe creator demonstrates a creative 'fine art' look by using Object Select AI to mask a bird, inverting the mask, and desaturating the entire background while keeping the subject in color.Luminar Neo· AI Photo Editor
- Watch “How Far Should You Edit Wildlife Photos? (Luminar Neo Tutorial)” →
AI Photo Editor
- 5:470:39Adjusting HSL and subject-aware vignettingThe creator uses the Color tool to target specific HSL values for a bird's bill and applies a vignette using a subject-placement indicator.Chiara Talia - Wildlife Photography
- 10:270:52Creative color isolation using AI maskingCurrentThe creator demonstrates a creative 'fine art' look by using Object Select AI to mask a bird, inverting the mask, and desaturating the entire background while keeping the subject in color.Chiara Talia - Wildlife Photography
 0:521:46Manage and sync folders in Luminar NeoThe creator demonstrates how Luminar Neo maps physical computer folders to its catalog, showing how renaming or moving folders on the hard drive is instantly mirrored in the software.Mark McGee Photos
- 16:560:36Edit photos using AI AssistantA demonstration of the AI Assistant where the user types natural language prompts like 'make this photo look like a vintage Fujifilm camera' to generate edit versions.Mark McGee Photos
 8:003:26Localized exposure adjustments using maskingThe creator shows how to use a brush mask to apply a second instance of the Develop tool to specific areas of a waterfall and rocks.Anthony Turnham
- 12:423:32Adding and removing detail with Structure AIDemonstration of using Structure AI with positive values to sharpen rocks and negative values to soften distracting foliage via brush masking.Anthony Turnham
- 20:482:31Changing water color with Water Enhancer AIA demonstration of the Water Enhancer AI tool to shift murky green water toward a turquoise hue while refining the mask to exclude the waterfall.Anthony Turnham
- 25:551:26Fine-tuning colors with HSL slidersThe creator demonstrates using the HSL (Hue, Saturation, Luminance) panel to darken green leaves specifically so the waterfall stands out more.Anthony Turnham
- 28:511:17Applying a Radial Gradient mask for color popA demonstration of using the Radial Gradient tool to apply a saturation boost in a localized, tapered circle around the main subject.Anthony Turnham
- 31:132:05Blending edits using Layer OpacityThe creator shows how to add the original photo as a new layer and adjust its opacity to pull back an over-processed edit for a more natural look.Anthony Turnham
 4:102:36Blending exposures with layers and linear gradientsThe video shows how to duplicate layers in Luminar Neo to process the sky and foreground separately, using a linear gradient mask for a smooth transition.Anthony Turnham
- 9:203:21Sculpting light and contrast using Curves and Brush masksA demonstration of using the Curves tool to create an S-curve for contrast and then painting the effect into specific areas like mountains and water using a soft brush.Anthony Turnham