Filmora: Bezier Curves and Animation Graphs

 Filmora
Demo summary
The user shows how to convert linear keyframes to continuous curves and use the animation graph panel to fine-tune motion timing.
Step-by-step
- Right-click on any keyframe in the timeline
- Select 'Select all keyframes' from the context menu
- Right-click again and choose 'Bezier Curve'
- Select 'Continuous Curve' from the curve options
- Manually adjust the handles in the animation graph panel to fine-tune the motion
Options
- Delete keyframe
- Delete all keyframes
- Copy keyframe
- Linear curve
- Freeze
- Ease in
- Ease out
Tips
- Use Continuous Curve to make animations look smoother and more natural rather than robotic
- Use the animation graph panel for professional-looking motion control
Highlights
“This makes the animation smoother and more natural instead of robotic movement.”
All demos from “Wondershare Filmora 15 Video Editor Tutorial for Beginners – Chapter 1: Overview, Interface & Basics”
- 2:331:02Organize and import media in Filmora 15The user demonstrates how to create custom folders for videos, images, and audio within the project media panel and drag files into them for organization.Filmora· AI Video Editor
- 5:100:38Timeline placement and panel managementThe demo shows dragging a video clip onto the timeline and separating the source and timeline preview panels for a custom workspace layout.Filmora· AI Video Editor
- 8:271:00Crop, Pan, and Zoom toolsThe tutorial shows how to use the crop tool to fit images to the screen and apply Pan and Zoom presets to create motion in a video clip.Filmora· AI Video Editor
- 9:320:31Splitting and Ripple Deleting clipsThe user demonstrates splitting a video using the scissor button and performing a ripple delete to remove gaps between clips on the timeline.Filmora· AI Video Editor
- 12:040:41Configuring Project SettingsA step-by-step walkthrough of setting the aspect ratio to 16:9, resolution to 1080p, and frame rate to 30fps within the Filmora 15 project settings menu.Filmora· AI Video Editor
- 12:450:50Transform and Flip video clipsThe demo shows how to use the Transform panel to adjust scale, position, and rotation, as well as flipping video horizontally or vertically.Filmora· AI Video Editor
- 13:350:43Using Blend Modes and OpacityThe user demonstrates layering two clips and applying different blend modes and opacity settings in the compositing panel to create a transparent overlay effect.Filmora· AI Video Editor
- 14:181:31Keyframe animation for motionThe tutorial demonstrates adding multiple keyframes to a clip to animate changes in scale, position, and rotation over time.Filmora· AI Video Editor
- 16:090:41Bezier Curves and Animation GraphsCurrentThe user shows how to convert linear keyframes to continuous curves and use the animation graph panel to fine-tune motion timing.Filmora· AI Animation Generator
- 18:121:00Blurring backgrounds for vertical videoThe demo shows how to use the Background tool to add a blurred version of the video or a solid color to fill black bars on vertical clips.Filmora· AI Video Editor
- Watch “Wondershare Filmora 15 Video Editor Tutorial for Beginners – Chapter 1: Overview, Interface & Basics” →
AI Animation Generator
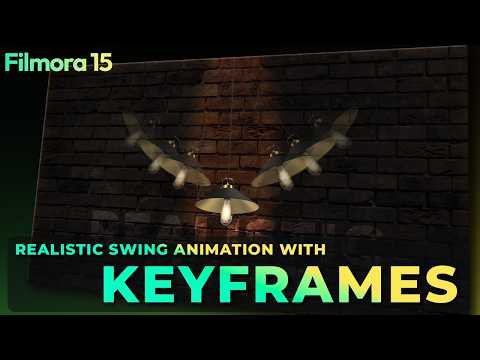 2:130:54Applying rotation keyframesThe user walks through placing the playhead at specific intervals and changing rotation values to create a swinging motion for the light asset.Filmora for Creators
 2:310:56Animate paths using the Pen ToolThe demonstration covers drawing a custom path with the pen tool, adjusting stroke styles, and using the 'path follow' feature to link objects to the animated line.Wondershare Filmora Video Editor
- 16:090:41Bezier Curves and Animation GraphsCurrentThe user shows how to convert linear keyframes to continuous curves and use the animation graph panel to fine-tune motion timing.Salih Tutorials
 3:070:32Fine-tune animation curves with handlesThe user demonstrates using the adjustment handles on Bézier points to manually customize the acceleration and deceleration of the zoom effect.Wondershare Filmora France