Animate images using Kling AI

 Kling AI
Demo summary
The video shows the process of uploading a generated image to Kling AI and applying an image-to-video prompt to create a 3D-style animation.
Step-by-step
- Open Kling AI and click on the upload image option
- Upload your generated image
- Paste your image-to-video prompt into the prompt field
- Edit the prompt text to remove unwanted elements or add camera movements like zooming in
- Select the model version (1.6 or 2.0)
- Click on Generate
Options
- Use Kling 1.6 for standard shots to save credits
- Use Kling 2.0 for better prompt adherence and fast motion movement
- Add specific camera movement instructions to the prompt
Watch out for
- AI-generated prompts may not be perfect and often require manual editing as a building block
Tips
- Start with Kling 1.6 for most shots as it uses fewer credits and often provides sufficient quality for 3D styles
- Reserve Kling 2.0 for scenes with fast motion to reduce artifacts and get smoother animation
- Use a GPT to generate initial image-to-video prompts to save time on brainstorming
Highlights
“it kind of makes the work much easier for you. You don't have to keep thinking, okay, what prompt do I have to use for this particular scene?”
All demos from “How to Create Full Animated Stories Using ChatGPT Images”
- 2:102:18Generate animation scripts and prompts with Animation Script Builder GPTThe creator demonstrates using his custom 'Animation Script Builder' GPT in ChatGPT to generate a character list, scene-by-scene shot list, and specific text-to-image and image-to-video prompts.ChatGPT· AI Storyboard Generator
- 4:432:49Generate consistent characters and scenes in ChatGPT-4oThe user demonstrates how to use ChatGPT-4o to generate consistent character reference images and scene shots based on the previously generated script prompts.ChatGPT· AI Person Generator
- 8:032:02Animate images using Kling AICurrentThe video shows the process of uploading a generated image to Kling AI and applying an image-to-video prompt to create a 3D-style animation.Kling AI· Image to Video
- 10:570:32Lip sync animation in Kling AIThe demonstration shows how to use the 'Lip Sync' feature in Kling AI by uploading a local audio file to match a character's mouth movements to the dialogue.Kling AI· AI Lip Sync Generator
- 12:171:01Animate and lip sync with Runway Gen-3 AlphaThe video shows the workflow in Runway ML for generating video from an image and using the lip sync action to align audio with the character's face.Runway· AI Lip Sync Generator
- 13:201:07Performance-driven animation with Runway Act OneThe creator demonstrates Runway's Act One tool, showing how a live camera recording of his own facial performance can drive the animation and expressions of a generated character.Runway· AI Animation Generator
- 15:130:28Assemble animated scenes in CapCutThe video demonstrates the final assembly of video clips, audio tracks, and sound design within the CapCut desktop video editor.CapCut· AI Video Editor
- Watch “How to Create Full Animated Stories Using ChatGPT Images” →


Image to Video
- 8:032:02Animate images using Kling AICurrentThe video shows the process of uploading a generated image to Kling AI and applying an image-to-video prompt to create a 3D-style animation.Emmanuel Crown
 2:301:24Animate still images using Kling AIThe creator demonstrates the image-to-video feature by uploading photos and using descriptive prompts to control camera movement and environmental animation.Roboverse
 10:361:18Animate images using Kling AI first and last framesThe user demonstrates using Kling 2.1 to animate a character by uploading a starting frame (with a hat) and an ending frame (without a hat) generated in Gemini.AI Samson
 3:321:08Generating consistent character angles with Multi-shotUsing a single image reference, the creator shows how to describe multiple camera angles and actions for a character to generate a consistent 12-second multi-scene video.Dan Kieft
- 15:001:06Image-to-video with start and end framesThe creator demonstrates the image-to-video method by setting a specific start frame and using multi-shot prompts to control the motion and narrative flow.Dan Kieft
 7:360:33Apply image effects in Kling AIThe user uploads a portrait photo to Kling AI's 'effects' tool and selects the 'flyer' template to generate a stylized motion video.@KevinStratvert
 4:200:36Animate AI images into video using Kling AIThe video demonstrates converting a static AI influencer image into a realistic video with natural gestures using the integrated Kling AI 2.1 model.The AI Hustle
 3:371:02Animate images using Kling AI Motion BrushThe video shows how to upload a starting image and use the Motion Brush tool in Kling AI to mask specific areas and define a movement path for birds in a cartoon scene.Caffeinated Blogger
 7:020:35Combine elements into a single videoThe user demonstrates combining two separate images—an empty car interior and a creature—into a single animated video using Kling O1's element feature.Dan Kieft
- 8:000:36Mimic camera motion from a reference videoThe demo illustrates how to upload a video with specific drone movement and apply that exact camera style to a static image using Kling O1.Dan Kieft
 20:400:49Using @ tags for specific image references in Kling O1The creator demonstrates the new tagging feature in the Kling O1 prompt bar, showing how to use the '@' symbol to reference specific uploaded images for character or object placement.Rourke Heath
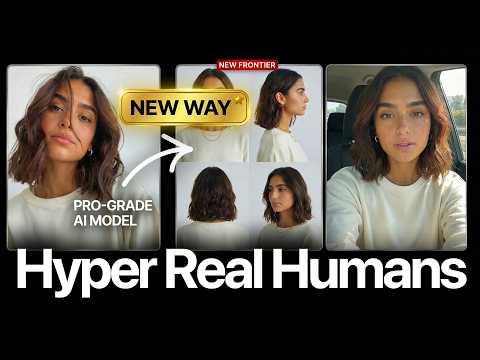 17:020:28Motion transfer with Kling AIThe creator shows how to use Kling Motion Transfer to map the movements from a real 'driving video' of himself onto a static AI influencer image.Sirio