Configure image generation settings in OpenArt

 OpenArt
Demo summary
A walkthrough of the OpenArt creation interface, showing how to select characters, input prompts, use reference images, and set output resolution up to 4K.
Step-by-step
- Click the Create button to open the full interface
- Select or switch between your characters at the top of the screen
- Describe the character's actions, location, and clothing in the prompt section
- Upload reference images if desired
- Select the output size and resolution
- Choose a model such as Nano, Banana Pro, or Cadream
Options
- Tag reference images directly within the prompt
- Set output resolution up to 4K
Tips
- Use 4K resolution if you are creating content for platforms that require high-quality visuals or want the sharpest look possible
All demos from “This is Boring, But You'll Master AI Filmmaking”
- 1:190:46Create a consistent AI character in OpenArtThe creator navigates the OpenArt interface to the character dashboard and explains how to initiate character creation using either image uploads or text descriptions.OpenArt· AI Person Generator
- 2:471:10Generate character variations with Nano Banana ProUsing a detailed text prompt for a 'vigilante hero', the creator selects the Nano Banana Pro model in OpenArt to generate and select a base character image.OpenArt· AI Person Generator
- 4:550:56Configure image generation settings in OpenArtCurrentA walkthrough of the OpenArt creation interface, showing how to select characters, input prompts, use reference images, and set output resolution up to 4K.OpenArt· AI Image Generator
- 8:021:00Animate images using Vidu 3.1The creator demonstrates the image-to-video workflow by selecting the Vidu 3.1 model, uploading a rooftop shot, and configuring specific motion prompts and duration.Vidu· Image to Video
- 10:241:01Create seamless transitions with start and end framesThe creator shows how to grab the last frame of a generated video in OpenArt and use it as a start frame for the next clip to ensure visual continuity.OpenArt· AI Video Extender
- 11:290:44Upscale video and add AI audioThe creator demonstrates using OpenArt's video upscale feature to reach 4K 60fps and the audio feature to generate ambient soundscapes.OpenArt· AI Video Upscaler
- Watch “This is Boring, But You'll Master AI Filmmaking” →

AI Image Generator
 7:061:43Compare multiple AI models simultaneouslyThe video shows how to use the 'select multiple' feature to compare outputs from GPT Image 2, Nano Banana 2, Recraft, and Kling 3 Omni using the same prompt.Wade McMaster - Creator Impact
 1:322:15Configure SmartShot settings in OpenArt AIThe user demonstrates how to access the SmartShot interface, enter a narrative prompt, select specific character references, and adjust output quality and resolution.Diary Influencer
 8:361:10Generate scene images with character referencesThe demonstration shows how to paste a scene prompt into OpenArt and attach previously generated character images to ensure the correct AI characters appear in the scene.Andrei Ai
 0:190:44Create and manage projects in OpenArtThe user demonstrates how to create a new project named 'fashion portrait' and shows how to rename or delete projects using the workspace panel in OpenArt.OpenArt
- 1:240:43Create folders and generate images within themThe user shows how to create a new folder called 'candid shots' and demonstrates that generating images while inside a folder automatically saves them to that specific location.OpenArt
 1:541:20Configuring a Smart Shot prompt in OpenArtThe user demonstrates how to enter a text prompt into the OpenArt Smart Shot interface and configure settings like sheet quality, aspect ratio, and video duration.Ai Lockup
 1:060:42Compare image generation models in OpenArtThe user demonstrates the visual differences between Nano Banana 2, Cedream 4.5, and Cling 3 Omni models using the same text prompt within OpenArt.Roboverse
- 3:190:48Save reusable objects and styles in OpenArtThe demonstrator uploads images of a pocket watch, an alleyway, and a specific aesthetic to save them as reusable 'Object', 'Background', and 'Style' assets in the library.Roboverse
 4:301:17Capturing shots with virtual camera controlsThe user shows how to set focal lengths (from 23mm to 300mm) and aspect ratios to 'take a shot' or render a high-fidelity 2D image from a specific perspective within the 3D world.OpenArt
 5:561:17Adjust camera angles with Camera ControlA demonstration of OpenArt's camera angle control tool to change the perspective of a generated image, including low-angle and top-down views.AI Video School
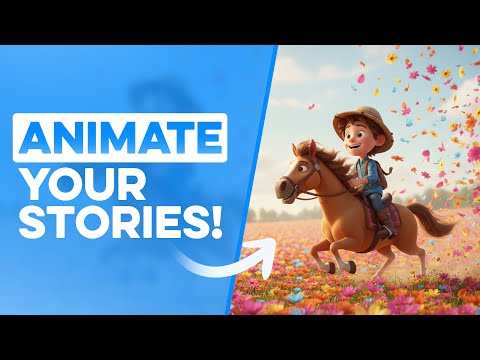 5:052:09Generate scene images with multiple characters in OpenArtThe video shows how to use the OpenArt workflow to place two previously created characters into a single generated scene image using specific character prompts.Roboverse
 2:470:24Generate a graphic design layout with Nano Banana 2The creator switches the model to Nano Banana 2 to generate the same carousel slide, comparing its cleaner but simpler layout to previous results.Youri van Hofwegen